Step 2: LangGraph Agent
Before we start integrating the LangGraph agent, let's understand how it works.
For the sake of this tutorial we won't be building the LangGraph together from scratch.
Instead, we'll be using the LangGraph constructed in the agent/ directory.
If you're interested in a step-by-step guide for building a LangGraph agent, you can checkout the LangGraph quickstart guide.
Let's walk through the LangGraph agent to understand how it works before we integrate it into the application.
Install LangGraph Studio
LangGraph Studio is a tool for visualizing and debugging LangGraph workflows. It is not required for using CopilotKit but it is highly recommended for understanding how LangGraph works.
To install LangGraph Studio, checkout the setup guide.
Retreive API keys
For this application, we'll need two API keys:
Setup the .env file
In a new terminal, navigate to the agent directory.
cd examples/coagents-travel/agentNow create a .env file there.
touch .envWith that created, we'll want to add your OPENAI_API_KEY and GOOGLE_MAPS_API_KEY to the file.
OPENAI_API_KEY=<your-openai-api-key>
GOOGLE_MAPS_API_KEY=<your-google-maps-api-key>
Visualizing the LangGraph Agent
With LangGraph Studio installed, you can run and visualize the LangGraph agent by opening the examples/coagents-travel/agent/ directory in the studio.
The agent will take some time to load as things get setup but once finished it will look something like this.
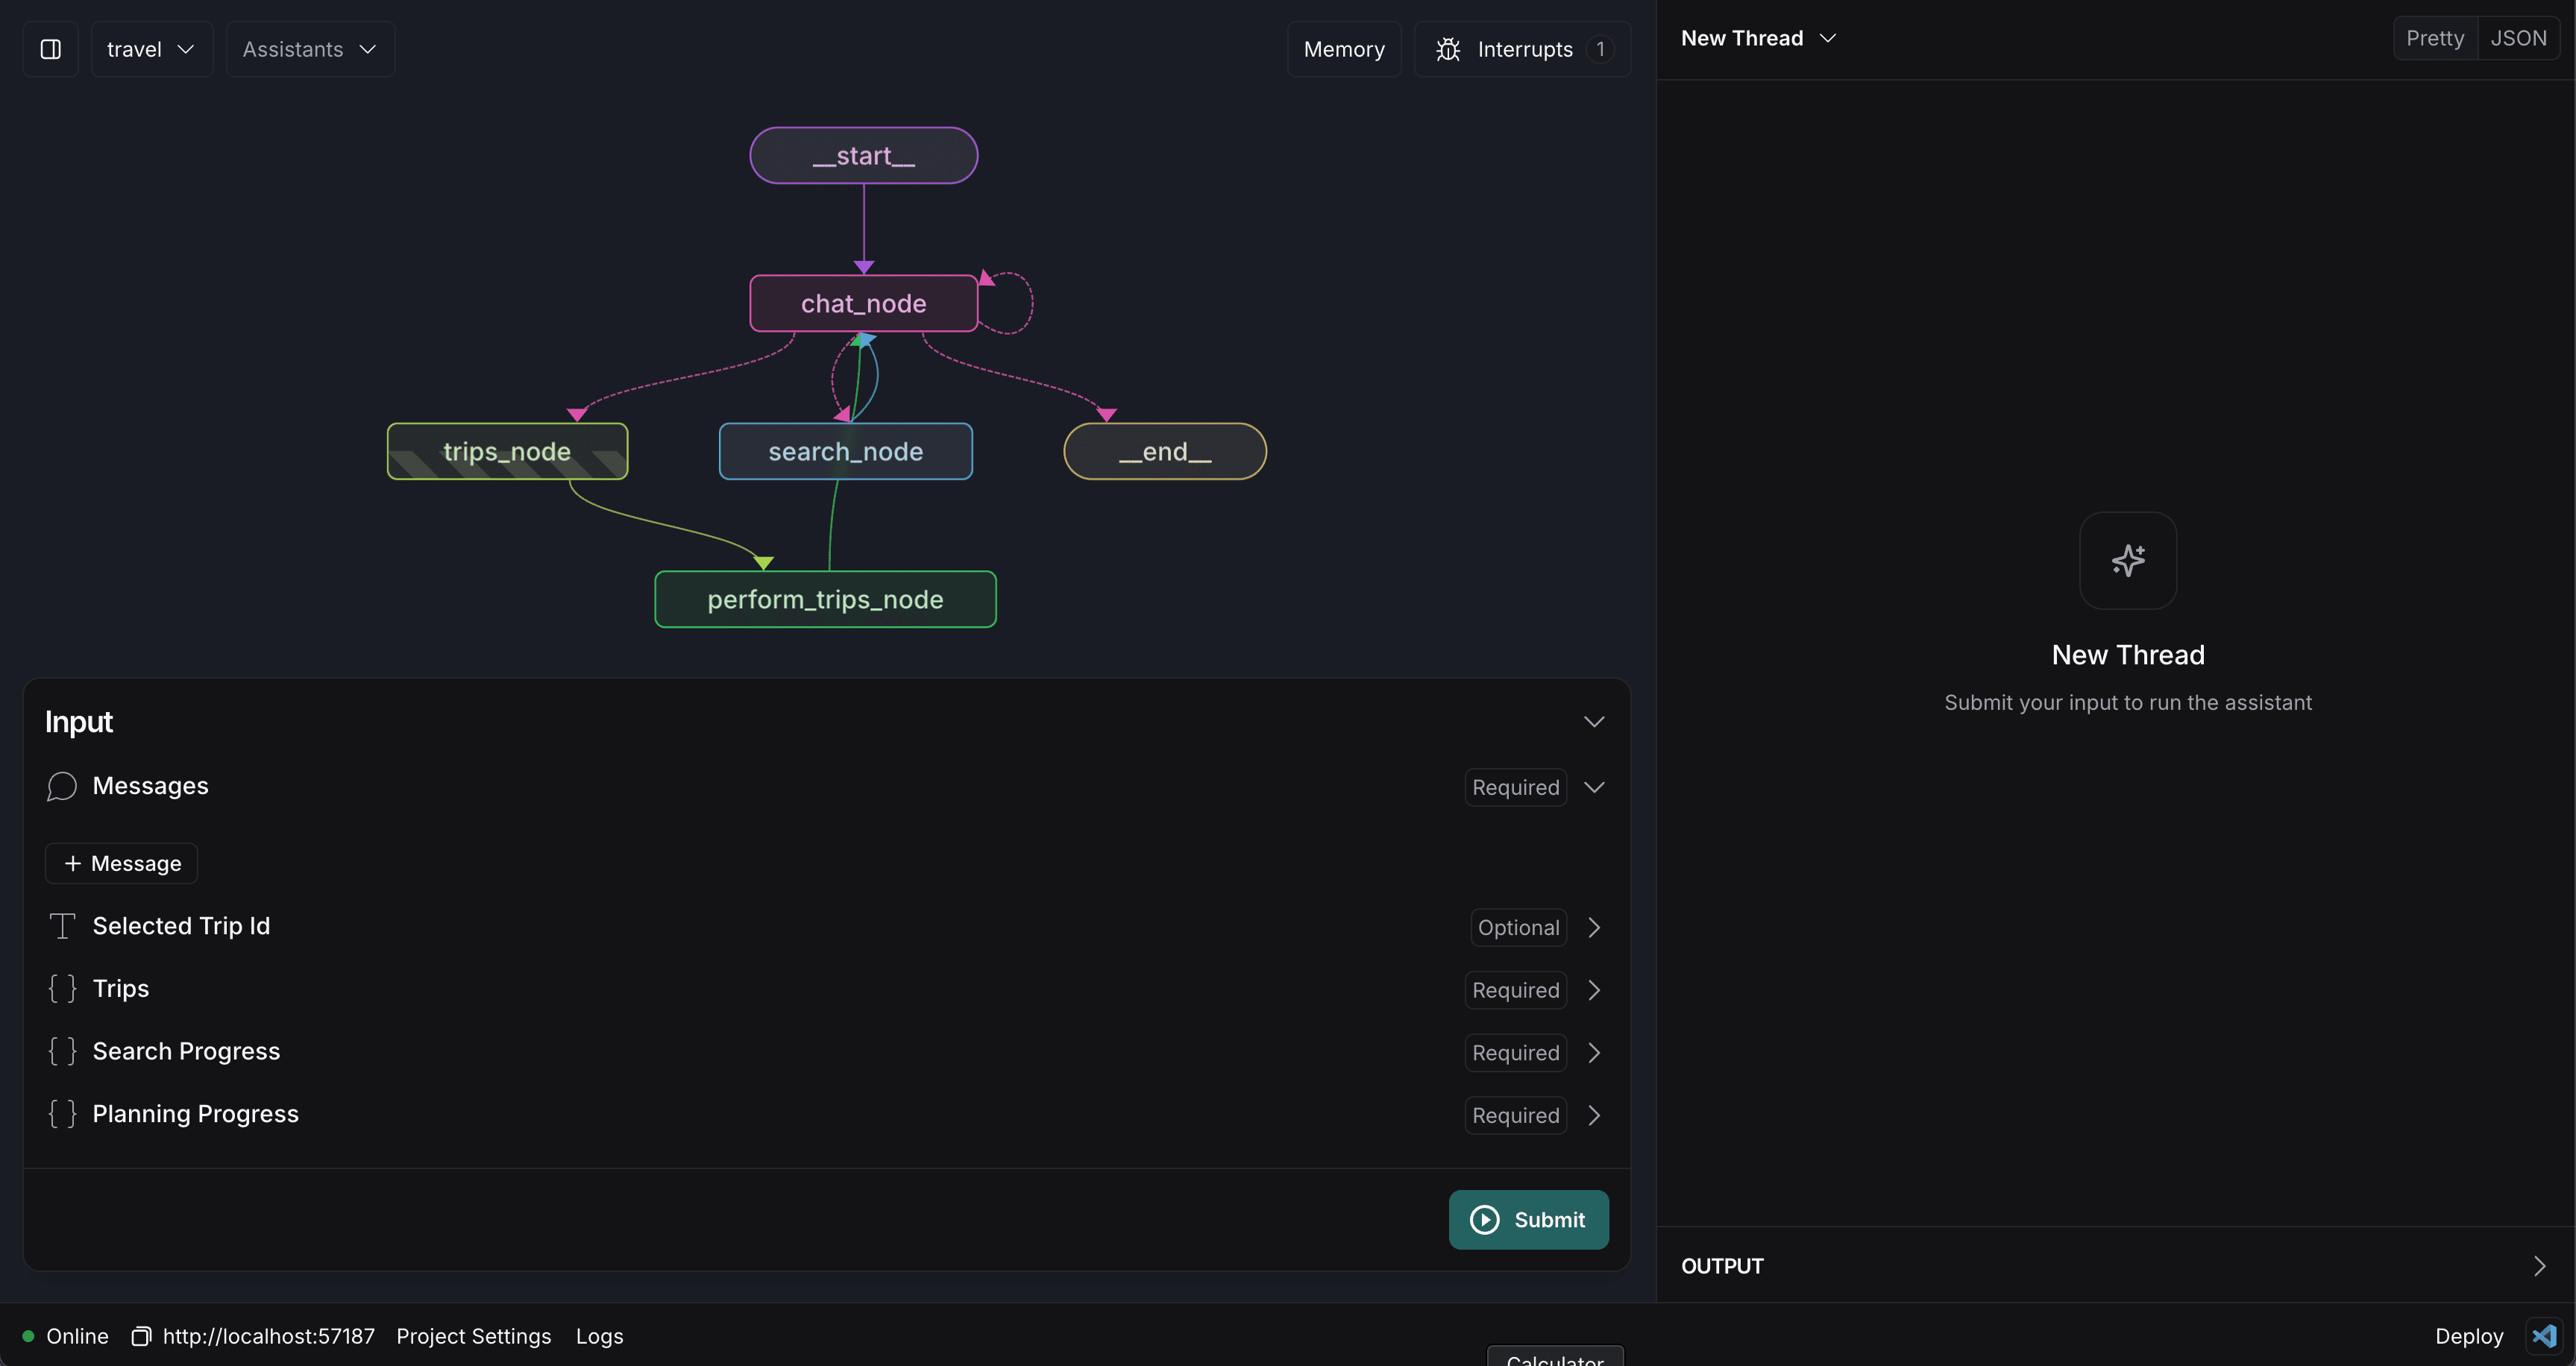
Understanding the LangGraph Agent
As we're building this agent into an agentic experience, we'll want to understand how it works. The key concepts at play here are:
- State: The state is the data that the agent is using to make and communicate its decisions. You can see all of the state variables in the bottom left of the screen.
- Nodes: Nodes are the building blocks of a LangGraph agent. They are the steps that the agent will take to complete a task. In this case, we have nodes for chatting, searching and performing operations on trips.
- Edges: Edges are the arrows that connect nodes together. They define the logic for how the agent will move from one node to the next. They are defined in code and conditional logic is handled with a
routefunction. - Interrupts: Interrupts are a way to allow for a user to work along side the agent and review its decisions. In this case, we have an interrupt before the trips_node which blocks the agent from proceeding until the user has approved the Agent's actions.
Testing the LangGraph Agent
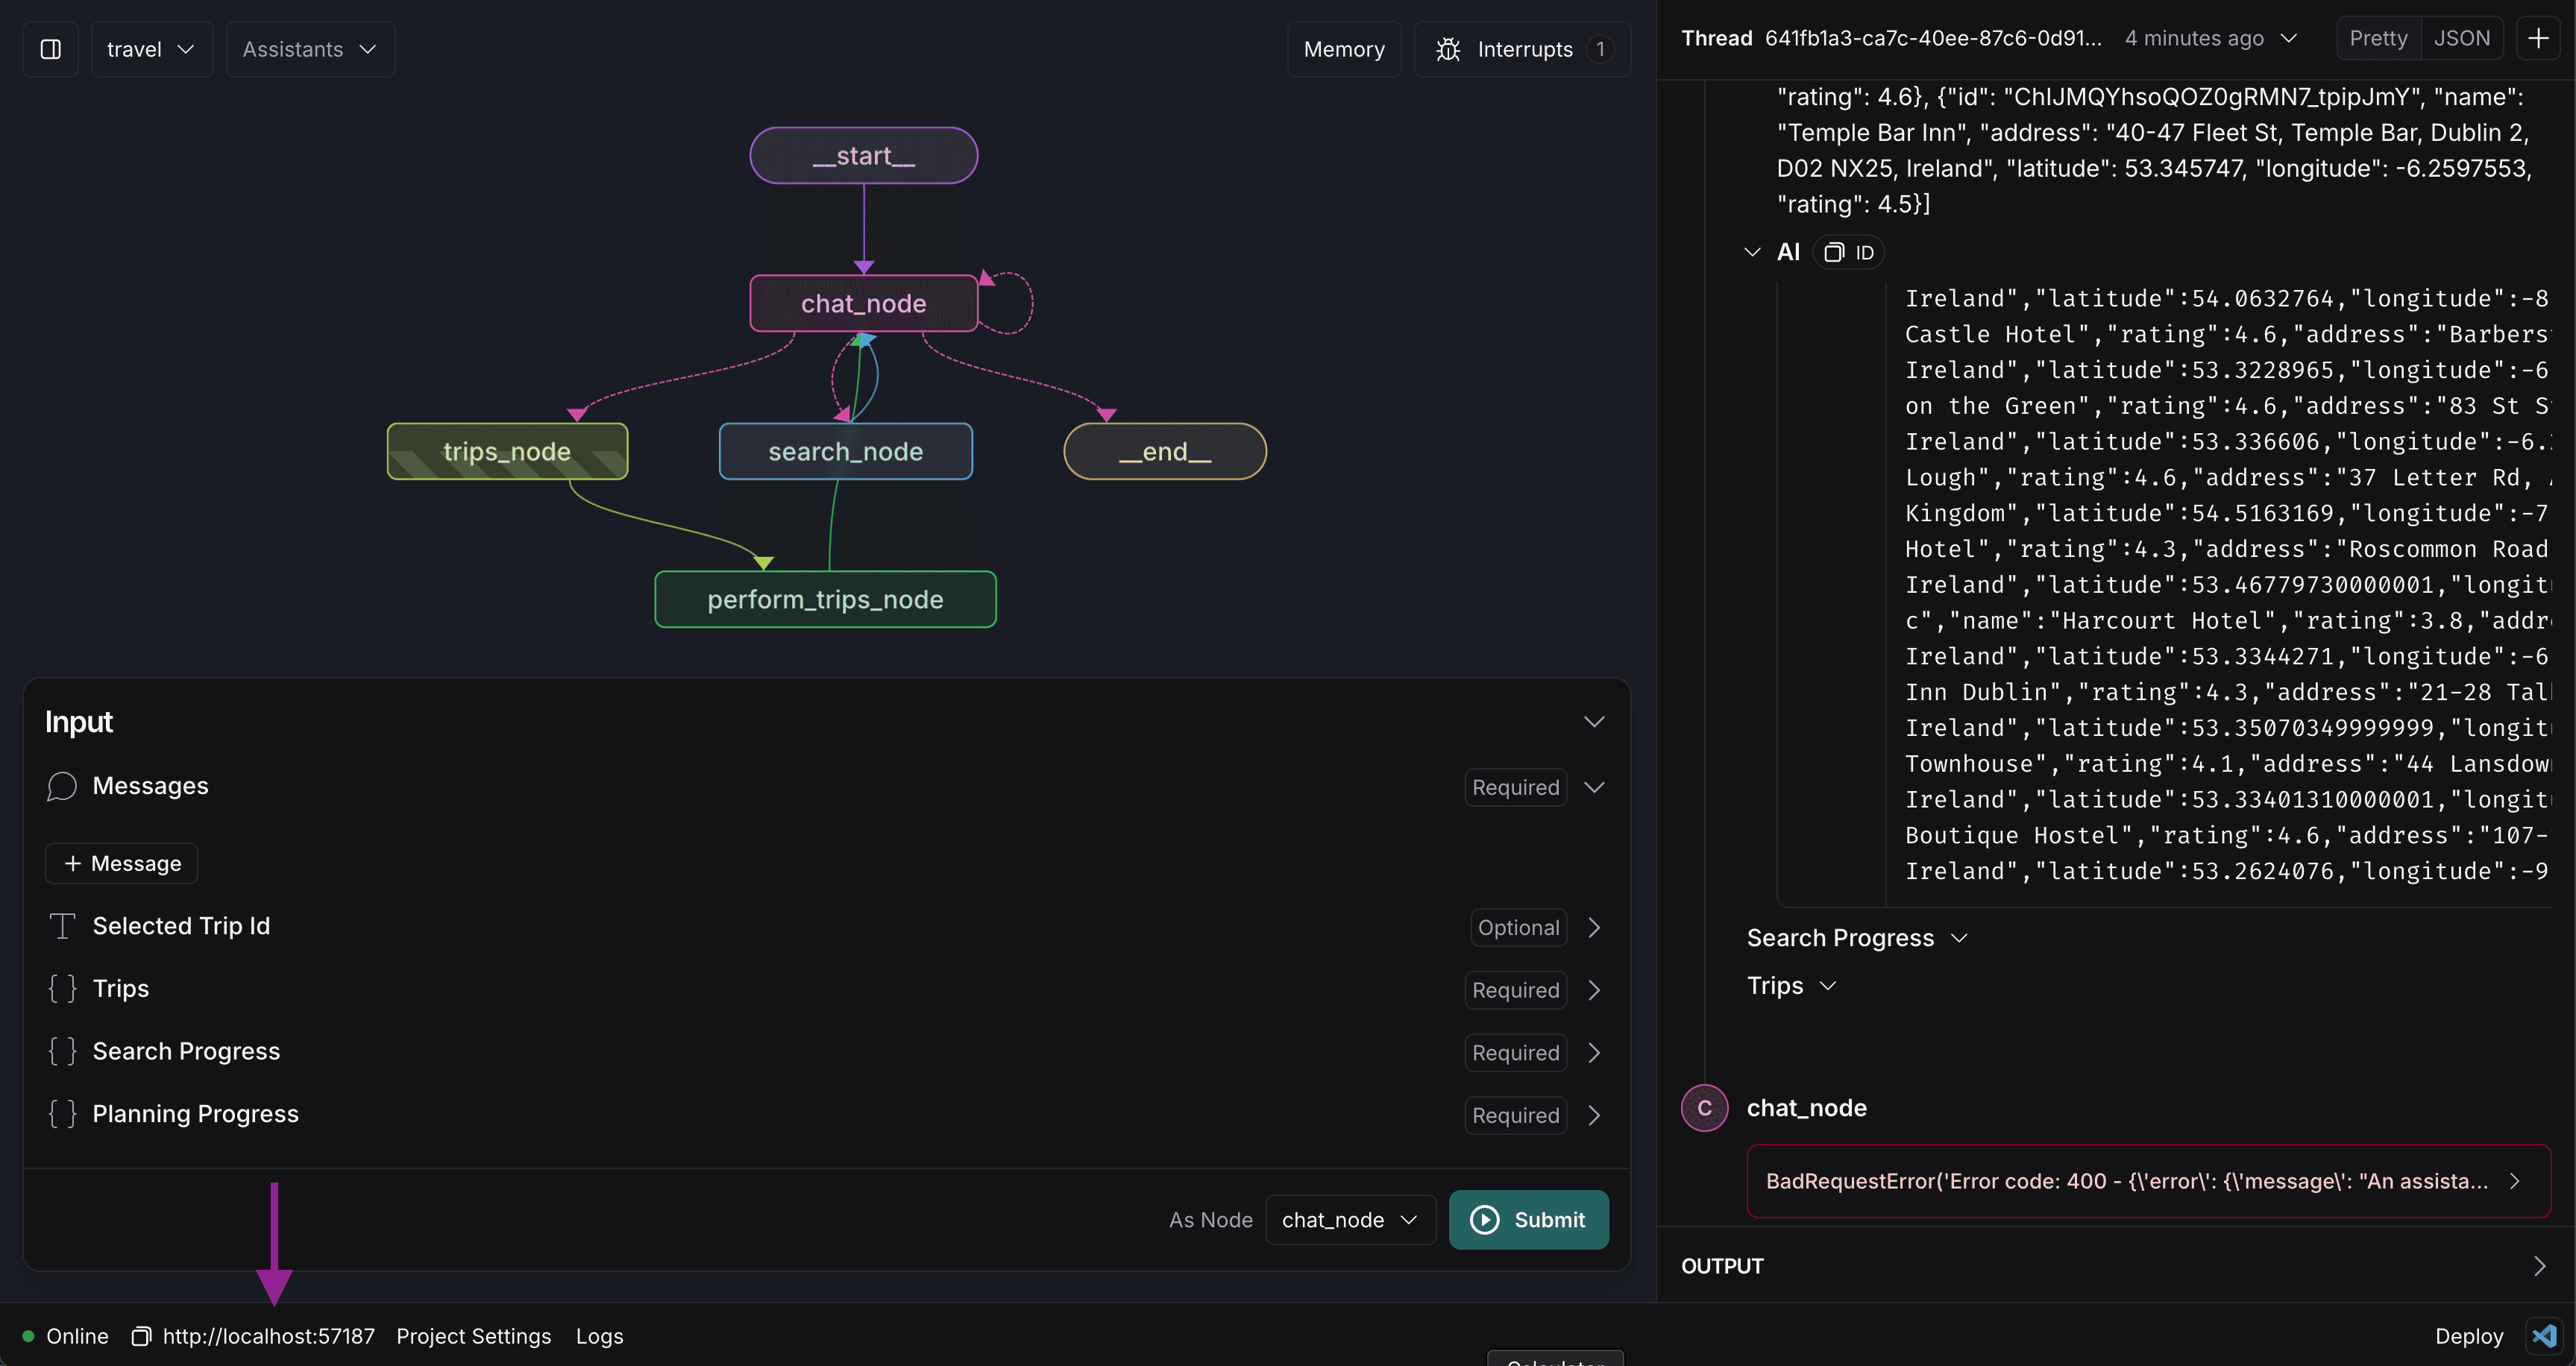
You can submit a message to the agent by adding a message to the messages state variable and then clicking "Submit".
You'll see the agent respond in the chat and direct appropriately through the various nodes. In this case, you should notice that the
agent calls the search_node and, once it has received a response, will add a new trip based on its findings to the state via the
trips_node.
Understanding breakpoints
A very important concept for agentic copilots is human-in-the-loop. This is the idea that the agent should be able to pause and wait for a human to review and approve its decisions. LangGraph allows for this by using breakpoints. Let's take a look at what that looks like in action.
First, click on the trips_node and select the interrupt_after option.
Now, try to have the agent create a new trip again. You'll notice that it now asks for approval before proceeding via a continue button.

Make sure to remove the interrupt_after option before proceeding, this will break things later if you don't.
Leave LangGraph Studio running
In order to create an agentic copilot, you'll need to have your LangGraph agent running somewhere. In our case, LangGraph studio is running this locally for us. We can see this by looking at the URL at the bottom left of the application.
Later in this tutorial, we'll be using this URL to connect CopilotKit to the LangGraph agent.
Here's what we did:
- Installed LangGraph Studio
- Setup the .env file
- Visualized the LangGraph agent
- Tested the LangGraph agent
- Left LangGraph Studio running
In the next step, we'll be integrating the LangGraph agent into the application as an agentic copilot.
